Painting Saturnine Terminators for Salamanders
My approach to painting Saturnine Terminators is fairly similar to the 'eavy Metal scheme, so in some ways this article won't be too surprising! However, I think it'll be useful for anyone looking to come reasonably close to the EM scheme/style – if not the quality!
The big learning from this projet is just how powerful sponges can be for painting, allowing you to achieve smooth, controlled blends similar to an airbrush: without all the hassle (read: cleaning) that comes with airbrush use.
Paints and other tools used
- Colour Forge Matt Black
- Nocturne Green
- Vulkan Green
- Elysian Green
- Ogryn Camo
- Krieg Khaki
- ATOM by Mig - Gold
- Iron Warriors
- Stormhost Silver
- Runelord Brass
- Brass Scorpion
- Mephiston Red
- Evil Sunz Scarlet
- Fire Dragon Bright
- Contrast Medium
- Tamiya TS 80 Clear Flat
Worth noting, these are all affiliate links to Element Games. A bit more about my affiliate tracking over on the privacy page.
Prep
I'd firstly recommend taking a look at Warcom's guide to Saturnine Terminator assembly. It has a few tips that the instructions don't, and even contradicts them in places: let them. You'll have an easier time.
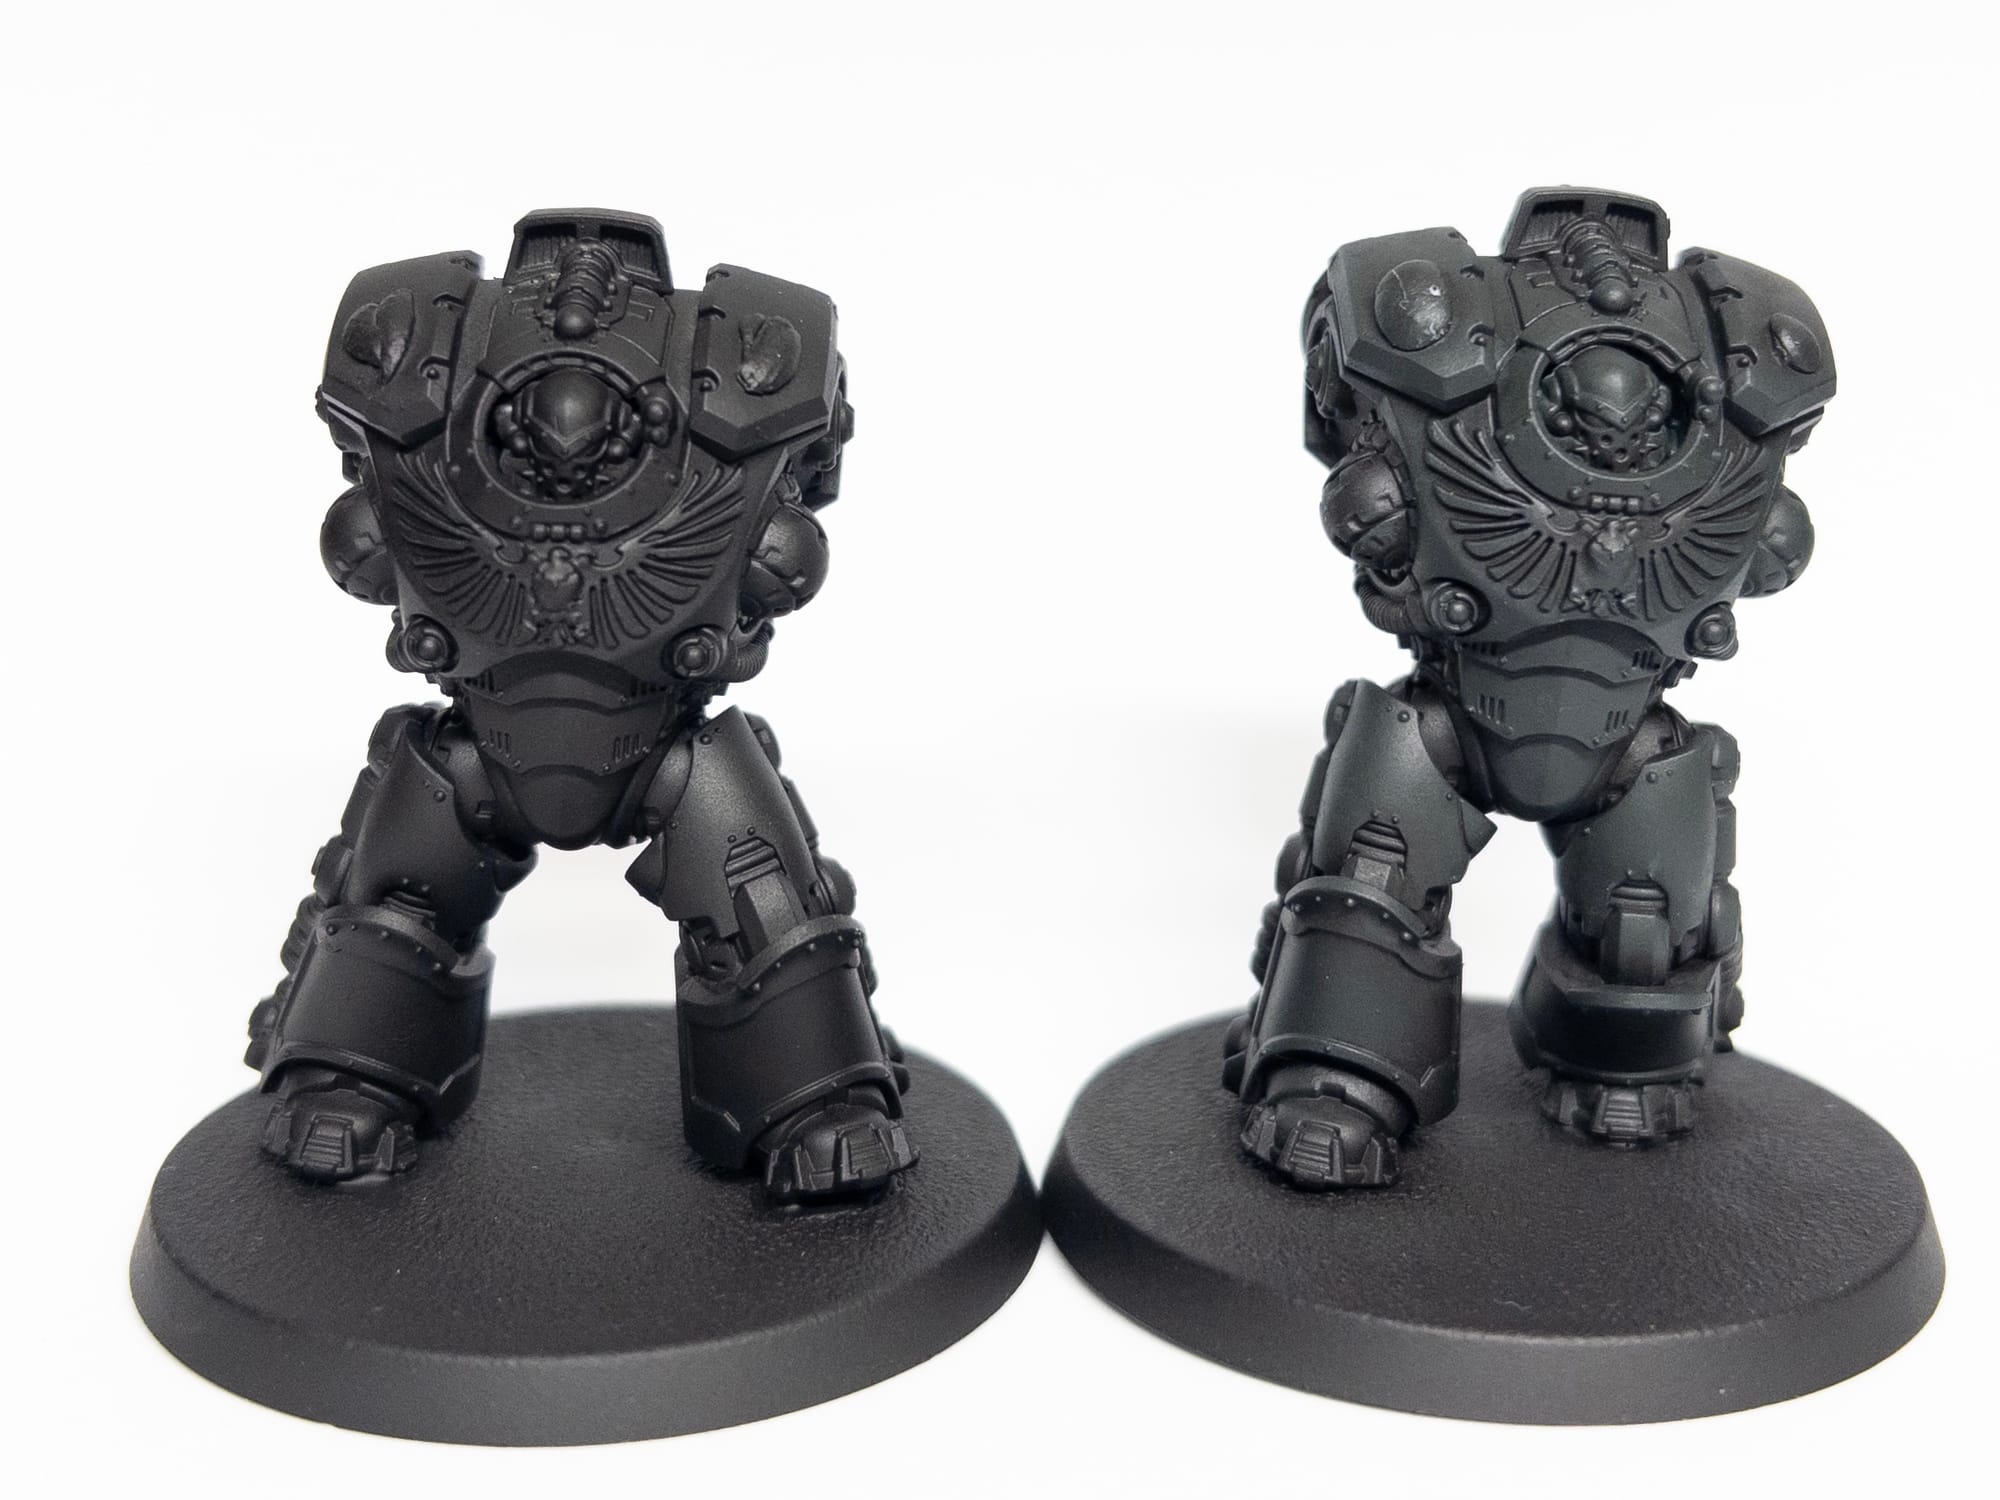
I primed the minis in Colour Forge Matt Black. I honestly cannot recommend Colour Forge primers highly enough. They're consistent, give you a bit more than average for your money, and come in a nice variety of colours.
I did opt for some sub-assemblies. I left the arms and shoulders off to make it easier to base coat stuff, as well as get to the details on the weapons. This is probably overkill, but I also left the power units on the back unglued. My reasoning being that it'll be easier to basecoat the power units if they're not part of the armour.
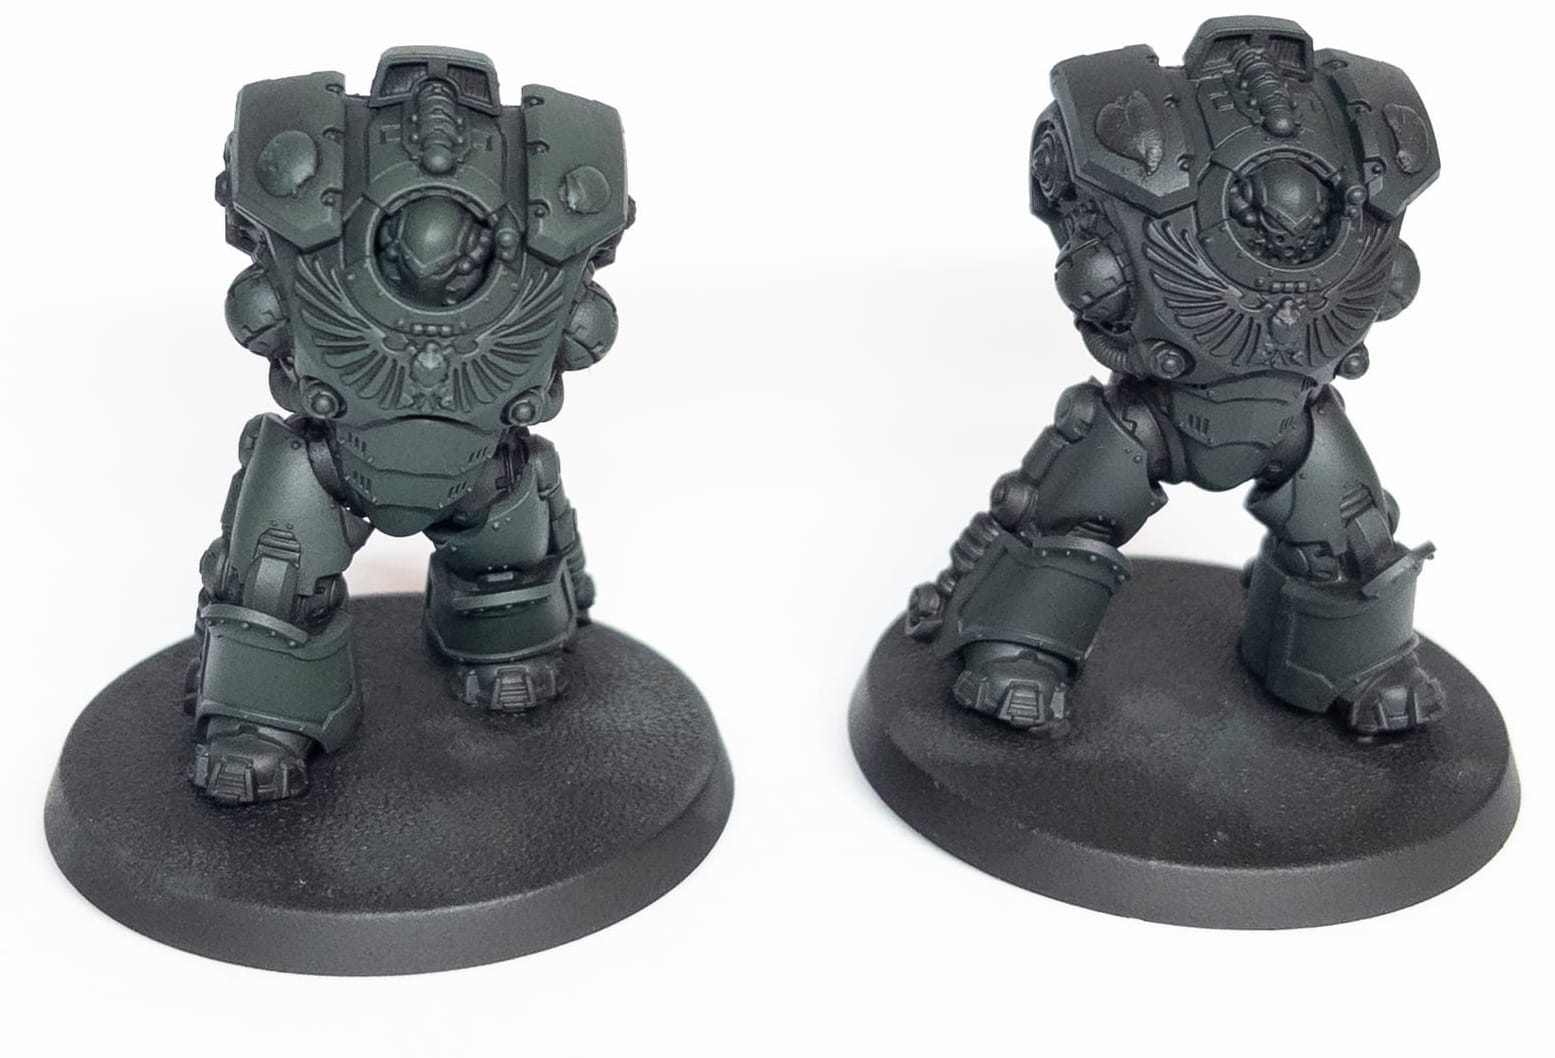
Sponging from basecoat to highlight.
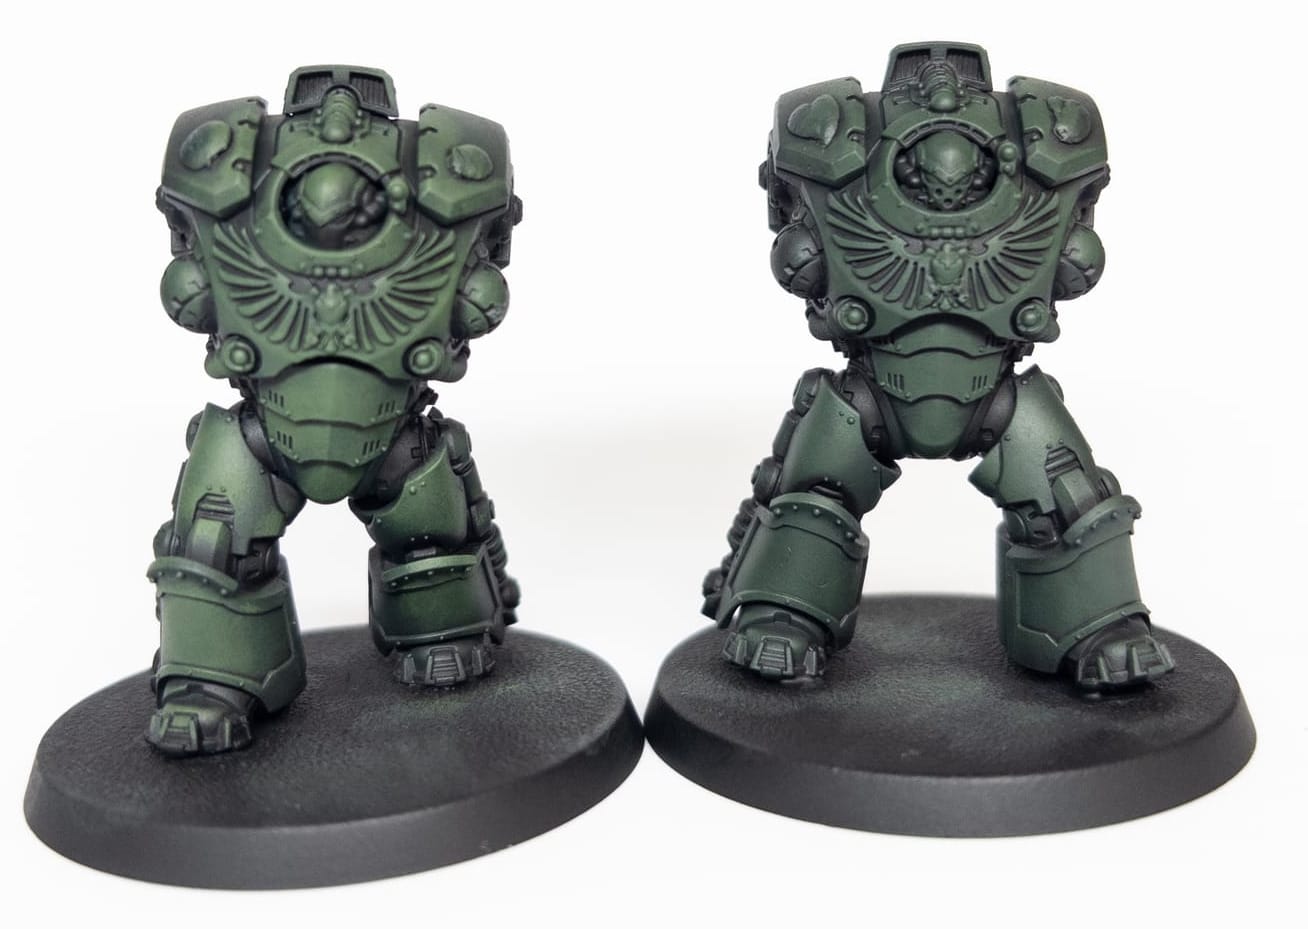
Basecoating the Saturnine's primary armour colour was nothing short of dreamy with makeup sponges. It's really very simple: start with Nocturne Green as your shade tone, Vulkan Green as your mid-tone, and Elysian Green as the dominent highlight. You'll get better results working with progressive layers.
First, Nocturne Green is very dark, and one coat wasn't really enough. I opted for two. This coat should be very heavy, and all over. Get it right in the recesses, because that's probably where it will remain most visible on the final piece. If needed, get a brush out to get into the places where a sponge simply won't fit. This particularly goes for inside the neck armour/behind the helmet.
I fairly reliable strategy here is to mix 50:50 on the previous colour, into the next. So, we're working with 3 colours here:
- Nocturne Green
- Vulkan Green
- Elysian Green.
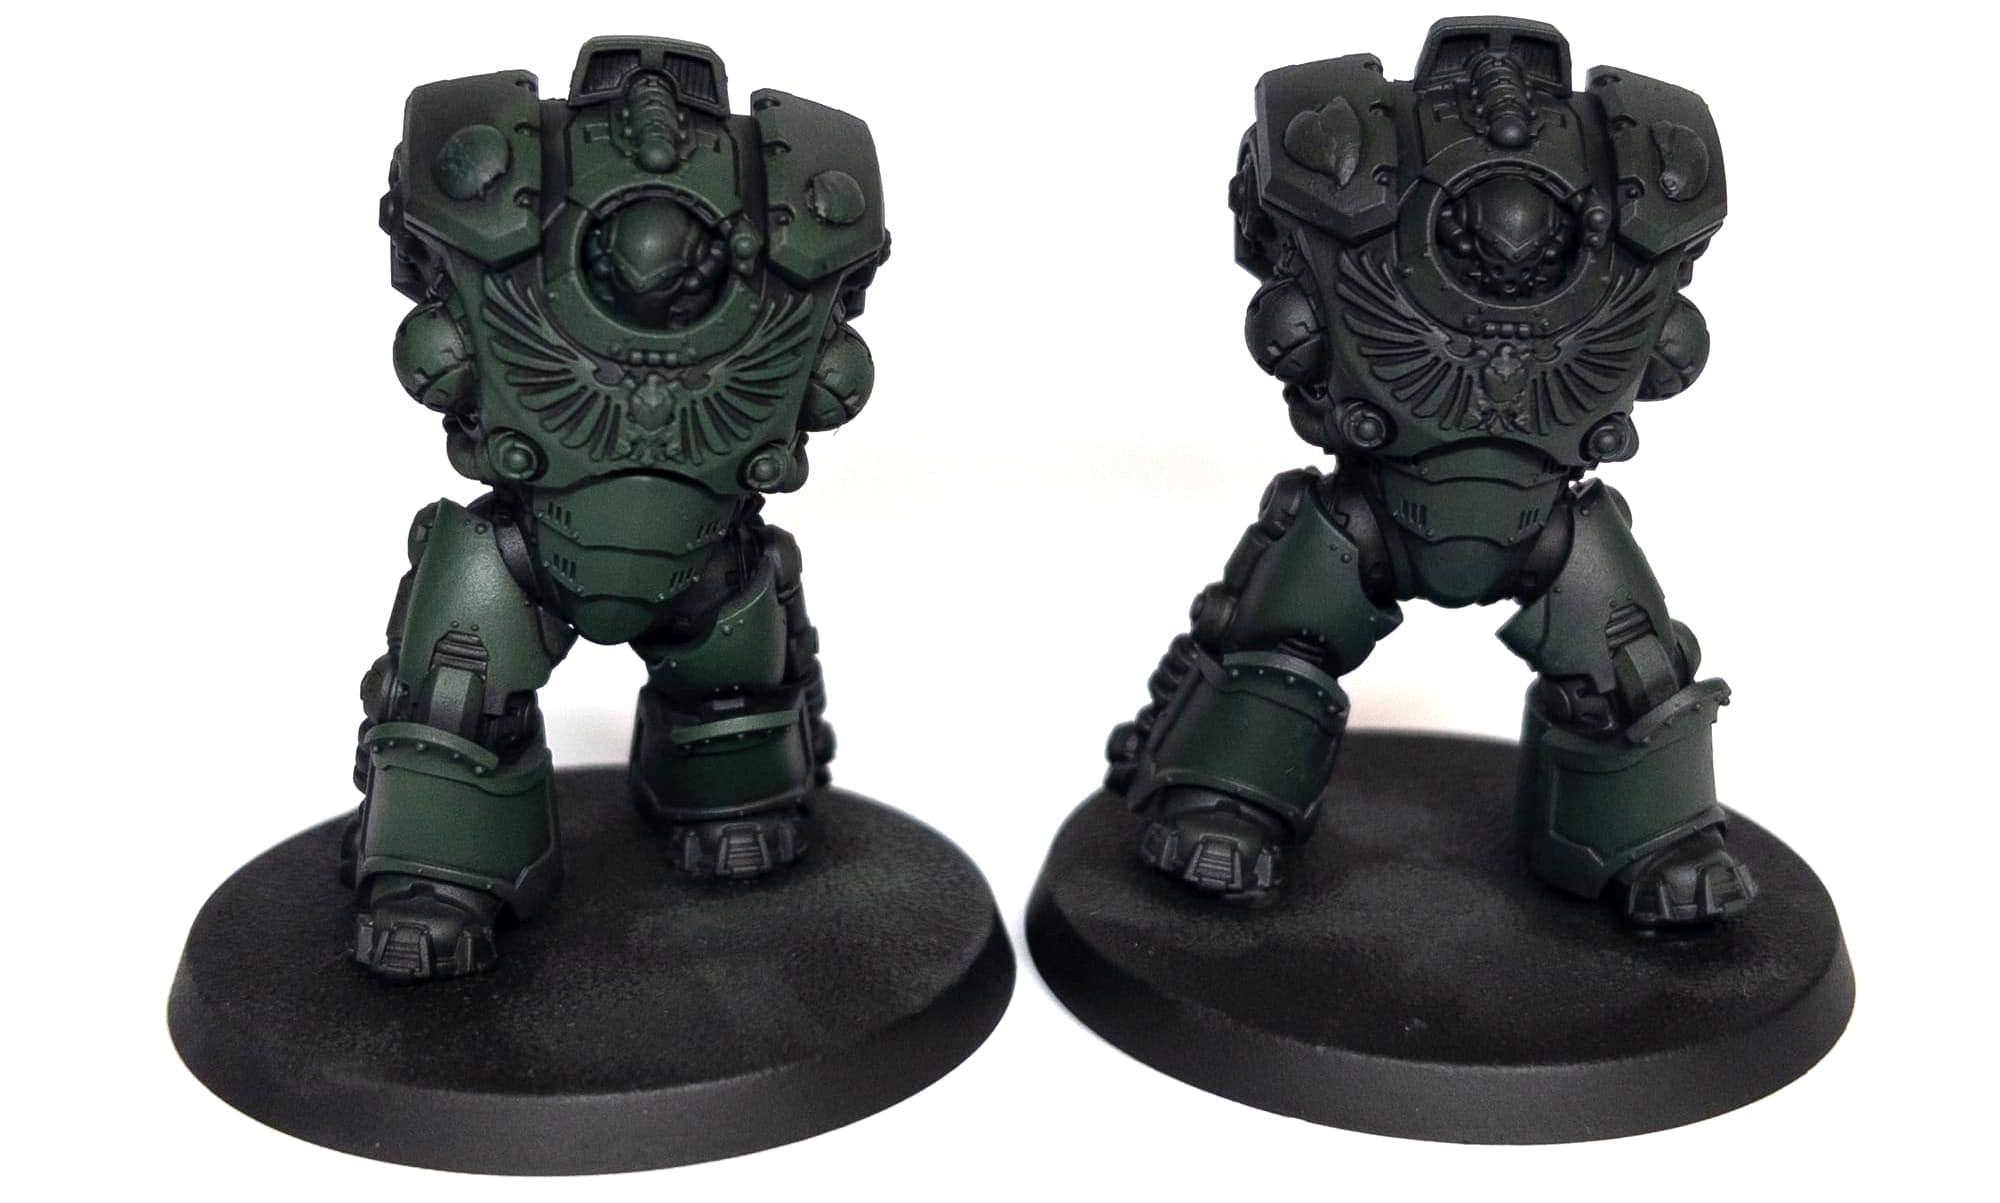
Between each green, mix 50:50, before using the next paint in full. Each layer should cover slightly less than the last, building up the highlights steadily. The great thing here about using a sponge, is that it helps keep the layers super thin.
Now we need to start building up to the mid-tones. A mix of Vulkan Green and Nocturne Green is next up. When sponging this layer on, it's important you start to do so more lightly: leaving bits of the previous layer visible. Most obviously this means the panel lines, but it's worth You very quickly start seeing quite a big difference in how the sculpt is accentuated by the next layer.
Your next layer of Vulkan Green needs to start focusing on the volumes you want to be more illuminated. What I found helpful here was to do one heavier coat, followed by a more targeted coat focused on the more visible areas, to start building up your volumes.
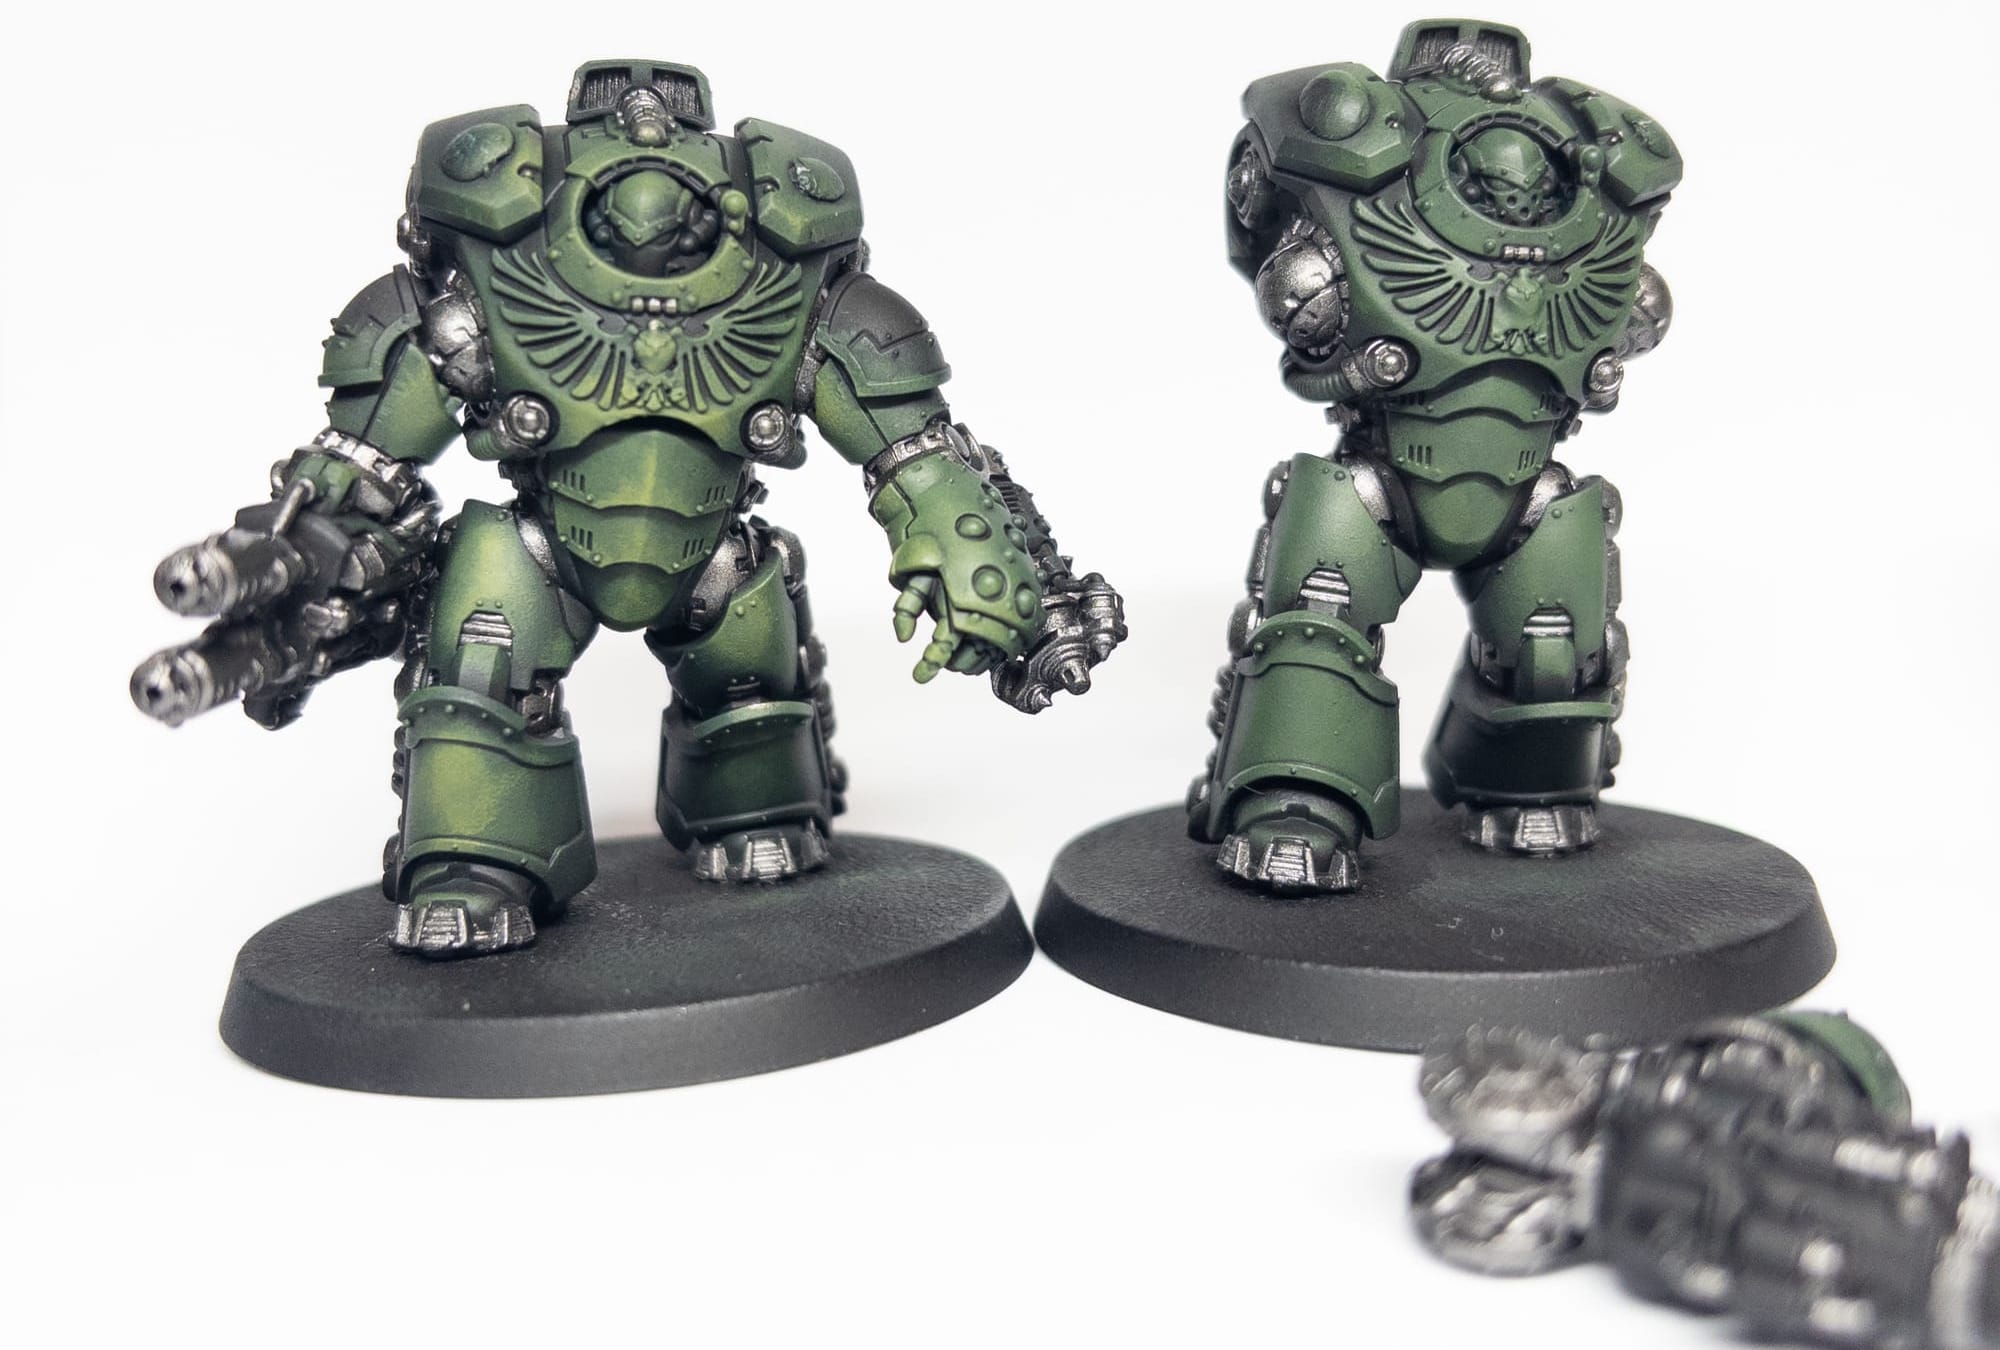
For the Vulkan/Elysian mix, something I found useful was using artist's sponge for the most part, but I found that it was helpful to work with two different types of sponges. After my test models I found that the makeup sponges were perfect for base coats, and even a lot of volume highlights. However, there were areas where they were just too big. You can get very cheap artist's sponges which are much smaller, and perfect for getting into smaller areas you still want to be highlighted such as shin pads. Once I was onto the Vulkan/Elysian mix, I was mostly applying paint with the artist's sponges, but I still found my makeup sponges better for achieving a smooth, blended look. So, I'd apply with one sponge, before blending with the other.
At this stage, it's worth painting the working metals - using a regular brush. I used Iron Warriors for this. It's the darkest iron metallic in Citadel's range, and works well for the base coat. The reason I suggest handling the metallics here, is that you'll probably find you make mistakes - or just end up with mica flakes surreptitiously finding a way onto your green. This gives you an easy opportunity to clean them up with Vulkan Green or the Vulkan/Elysian mix.
It's time for the final use of the sponge: a very light application of pure Elysian Green on the top highlights. This should be fairly sparing: I used it only on the front of the mini, and on places where I wanted the volumes to be brightest. This is the moment where I really feel like the sponge technique comes together brilliantly, making the volumes really stand out, without too much effort compared to brush painting, and without all the overhead that comes with airbrushing.
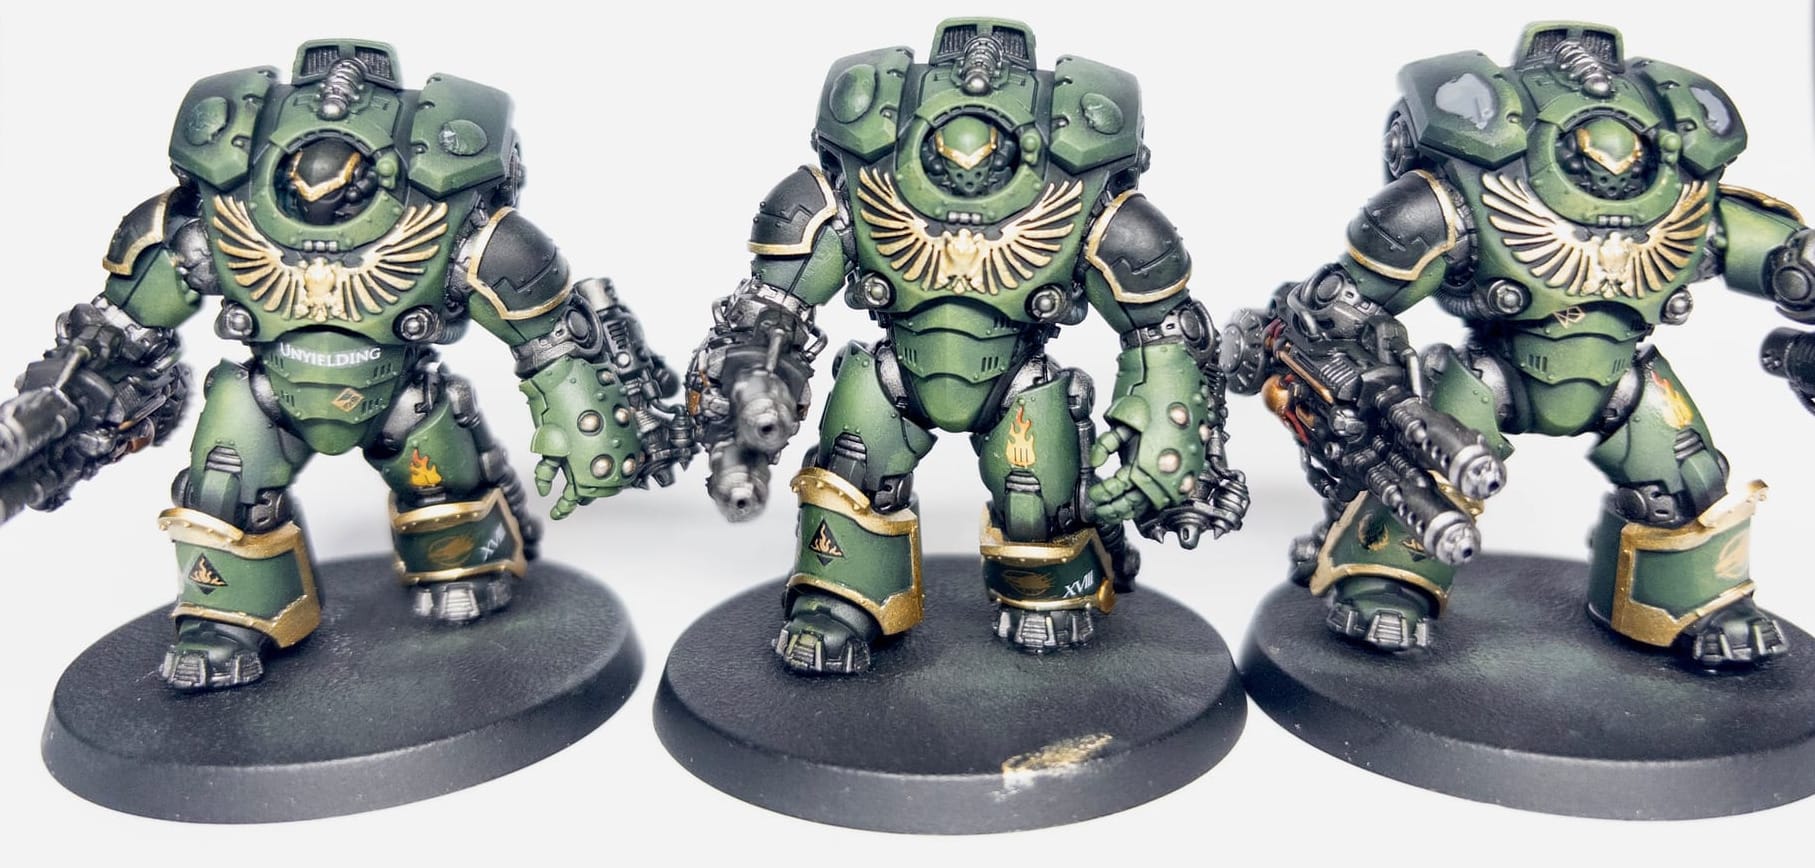
Down to details
At this stage an awful lot of the Terminator is painted. Here's where I go back over the weapons to paint some of the surfaces Abaddon Black where I'd got Iron Warriors on. Weapons can just be done all metallic (and it's maybe more realistic?) but I think a little variety breaks them up. I like to add little details with either Runelord Brass, or Brass Scorpion. After this, I give the whole thing a wash with Nuln Oil.
Something I had to decide while working on these details on the weapons, is just how much time I really wanted to spend on them. These are very detailed pieces of the model, and you can spend a long time on them: for instance, I could have chosen to do hazard markings on the power cables. I've done this a lot at this point on other models, and I basically decided that I wanted to shave time off by just going with a simple red accent colour. Similarly, I decide I won't go too over the top on highlighting the black. It looks great when you do it, but I just don't want to spend too long on these.
It's at this point I decided to apply transfers to the main body (not the shoulder pads, they have to come later). For adding transfers I keep it simple: once I'm sure everything's dry from previous steps, it's just a case of using water, transferring with a brush, and softening with Microsol. Leave them overnight at this point!
The next big thing to consider is the trim, which isn't heavy for the Saturnine, but is prominent. For this, I opted to use ATOM by Mig Gold. These are interesting paints: they are self-levelling, similar to enamels, but they're still acrylic. They have a brilliant shine to them, which is good considering the next step will dull them down a fair bit.
This is where we need to start shading the trim metallics. This is honestly something that took a lot of trial and error. Contrast paints are great for shading metallics, but you need to both thin heavily, and control the application - because thinned contrast still has a lot of body from the medium, and it will pool, and will dry quite thick if you're not careful. Thinning with water is possible, but I've generally found Contrast Medium easier to control. After experimenting with Gore Grunta, I eventually decided to use both Wyldwood for the all-over shade, and Ratling Grime for the areas of deeper shade.
Making things pop
At this stage, the model will be looking pretty complete. You could do transfers at this stage, though I opted to leave it till after the next step.
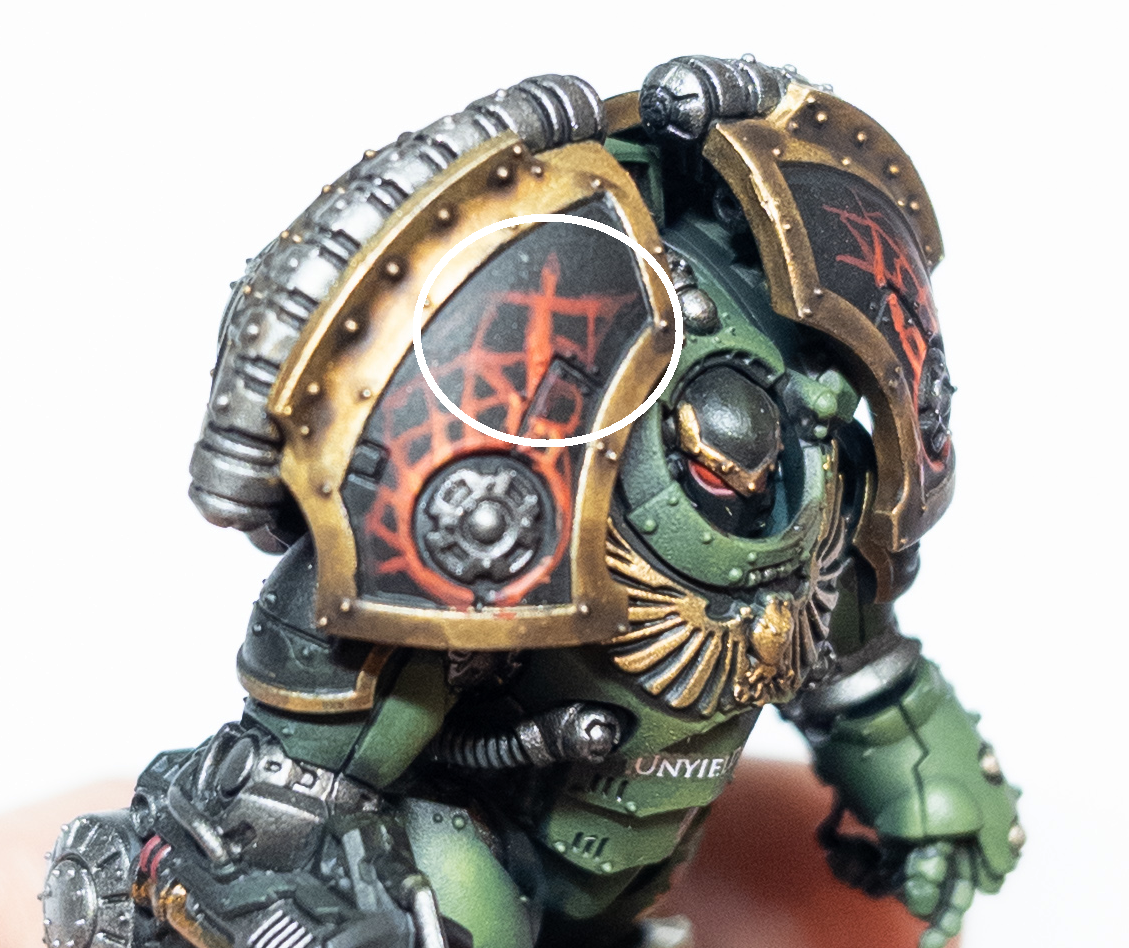
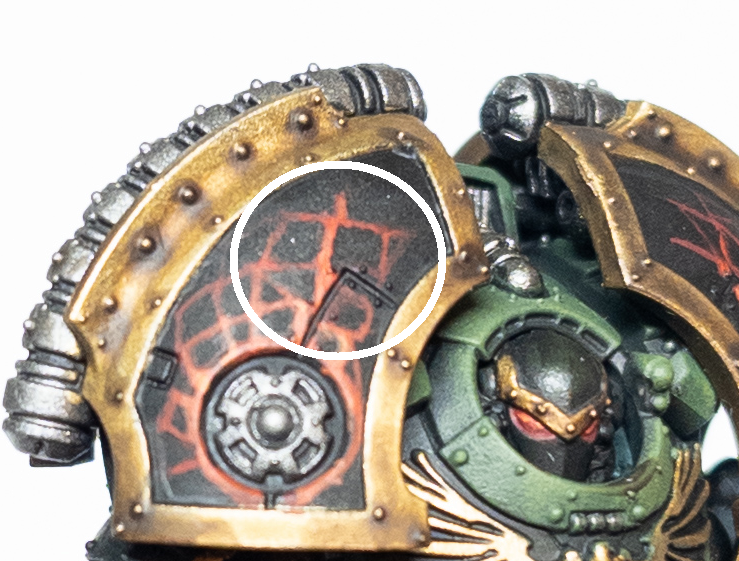
Adding fire accents.
Four accent colours, I chose red/orange, which I think offer a nice contrast with the Green (sorry protanopia/deuteranopia people - maybe blues or yellows instead?). I used this on the eye lenses, as well as the lava pattern free hand on the shoulders, which is worth explaining.
The artwork generally makes these patterns look like cooling/cracked lava. I tried two approaches for this: 1) painting the lava hues, and then painting the cooled patches, and 2) painting the lines progressively. I found 1 simply didn't work for me. It just looked messy. So, I painted back to black, and then started with Mephiston Red, layered on some more focused lines of Evil Sunz Scarlet, before adding a highlight mix of Fire Dragon Bright and Evil Sunz Scarlet.
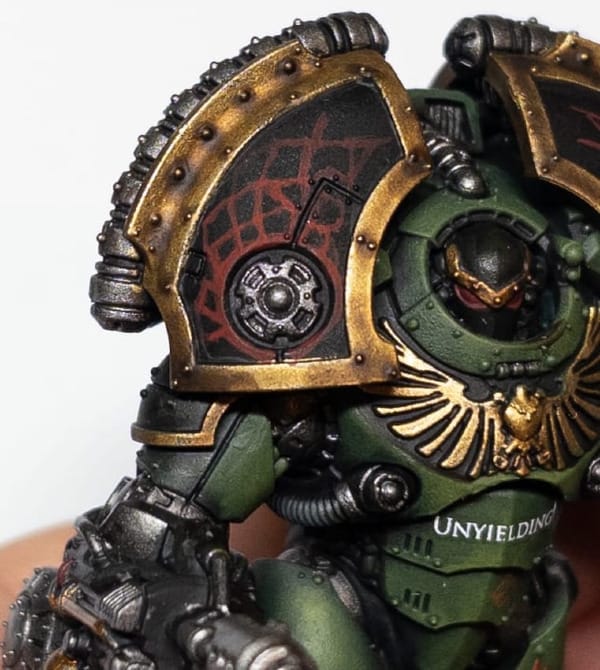
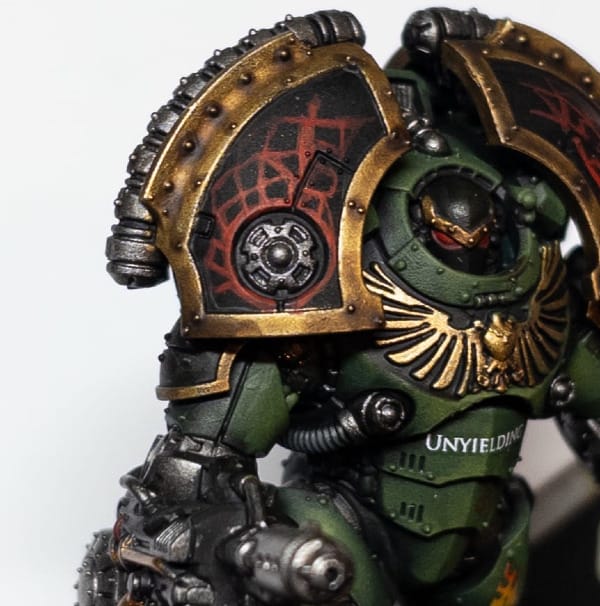
Finally, some dots/feint lines of Fire Dragon bright help complete the effect. Something I'd recommend here is that you don't think too hard about the shapes you're sketching. Irregular, somewhat angular shapes seem to work nicely. You'll probably hate the first sketch layer, but as you build up the hues it'll come together.
Something I found was that it was quicker to go fast, make mistakes, and then just correct with black afterward. You can see below the before/after in doing this.
Highlights/weathering.
So for the final highlights, I'm mostly focused on the green highlights. For recessed areas, a highlight of mixed Vulkan Green and Elysian Green is probably enough for my standard. From there, it's a case of gradually adding finer and finer highlights, starting with Elysian Green. Something you're going to notice in the photos below, is that I'm actually pretty sparing with where I add these edge highlights. I focus much more on the front of the minis: these aren't display pieces, and I'm concious that nobody is going to be looking at the rear of the model much.
Upper highlights should be very sparingly done with Ogryn Camo. This is where I'd consider weathering too. I dotted very small patches & lines of Ogyn Camo, with dots of a mix of Rhinox Hide and black to add pits. It's also an easy/lazy way of cleaning up spots where you mess up on the highlights. Unfortunately, I seem to have either forgotten or accidentally deleted photos taken from these steps! But, you can see the final results fairly clearly in the end gallery.
Now is a good time to apply varnish if you intend to. I like to do so to protect things for the table. I started with an all over spray of satin varnish: this helps unify the transfers with the rest of the model. This is followed by a coat of Tamiya TS 80 Clear Flat. It's best to leave it a while to dry before doing more now - 24 hours or longer, to give it time to cure.
The Tamiya TS80 just flattened the sheen on our metallics. This sometimes looks fine honestly, but very often you want to bring it back. This means going back to highlights with the metallics, and why I didn't do so earlier. Rather than the ATOM by Mig Gold, I chose to use Retributor Armour, mixing in Stormhost Silver up until I get to pure Stormhost Silver. The tradeoff here is of course that the metallics won't be so hard wearing. You could brush on some varnish, but I choose not to.
Basing
It's finally time to base! I'm fairly unimaginitive with basing my Salamanders, but quite thorough.
- First, a layer of Steel Legion Drab. Let it dry!
- Apply some patches of Agrellan Earth
- Add patches of Agrellan Badland to wherever you've not added earth.
- Let it dry - ideally overnight. This gives the crackling effect time to cure.
- Drybrush with a mix of Steel Legion Drab and Zandri Dust
- Drybrush with pure Zandri Dust
I like to work the model into the base a little too: for this, I just wash heavily thinned Steel Legion Drab onto the feet/ankles.
You could stop here! I like to add some pigment powders too though. I usually apply a coat of matt varnish to the base, and then liberally apply pigment powders.
Apply tufts to taste.
And final-finally! It's time to rim your base black as the gods intended, and call it done.
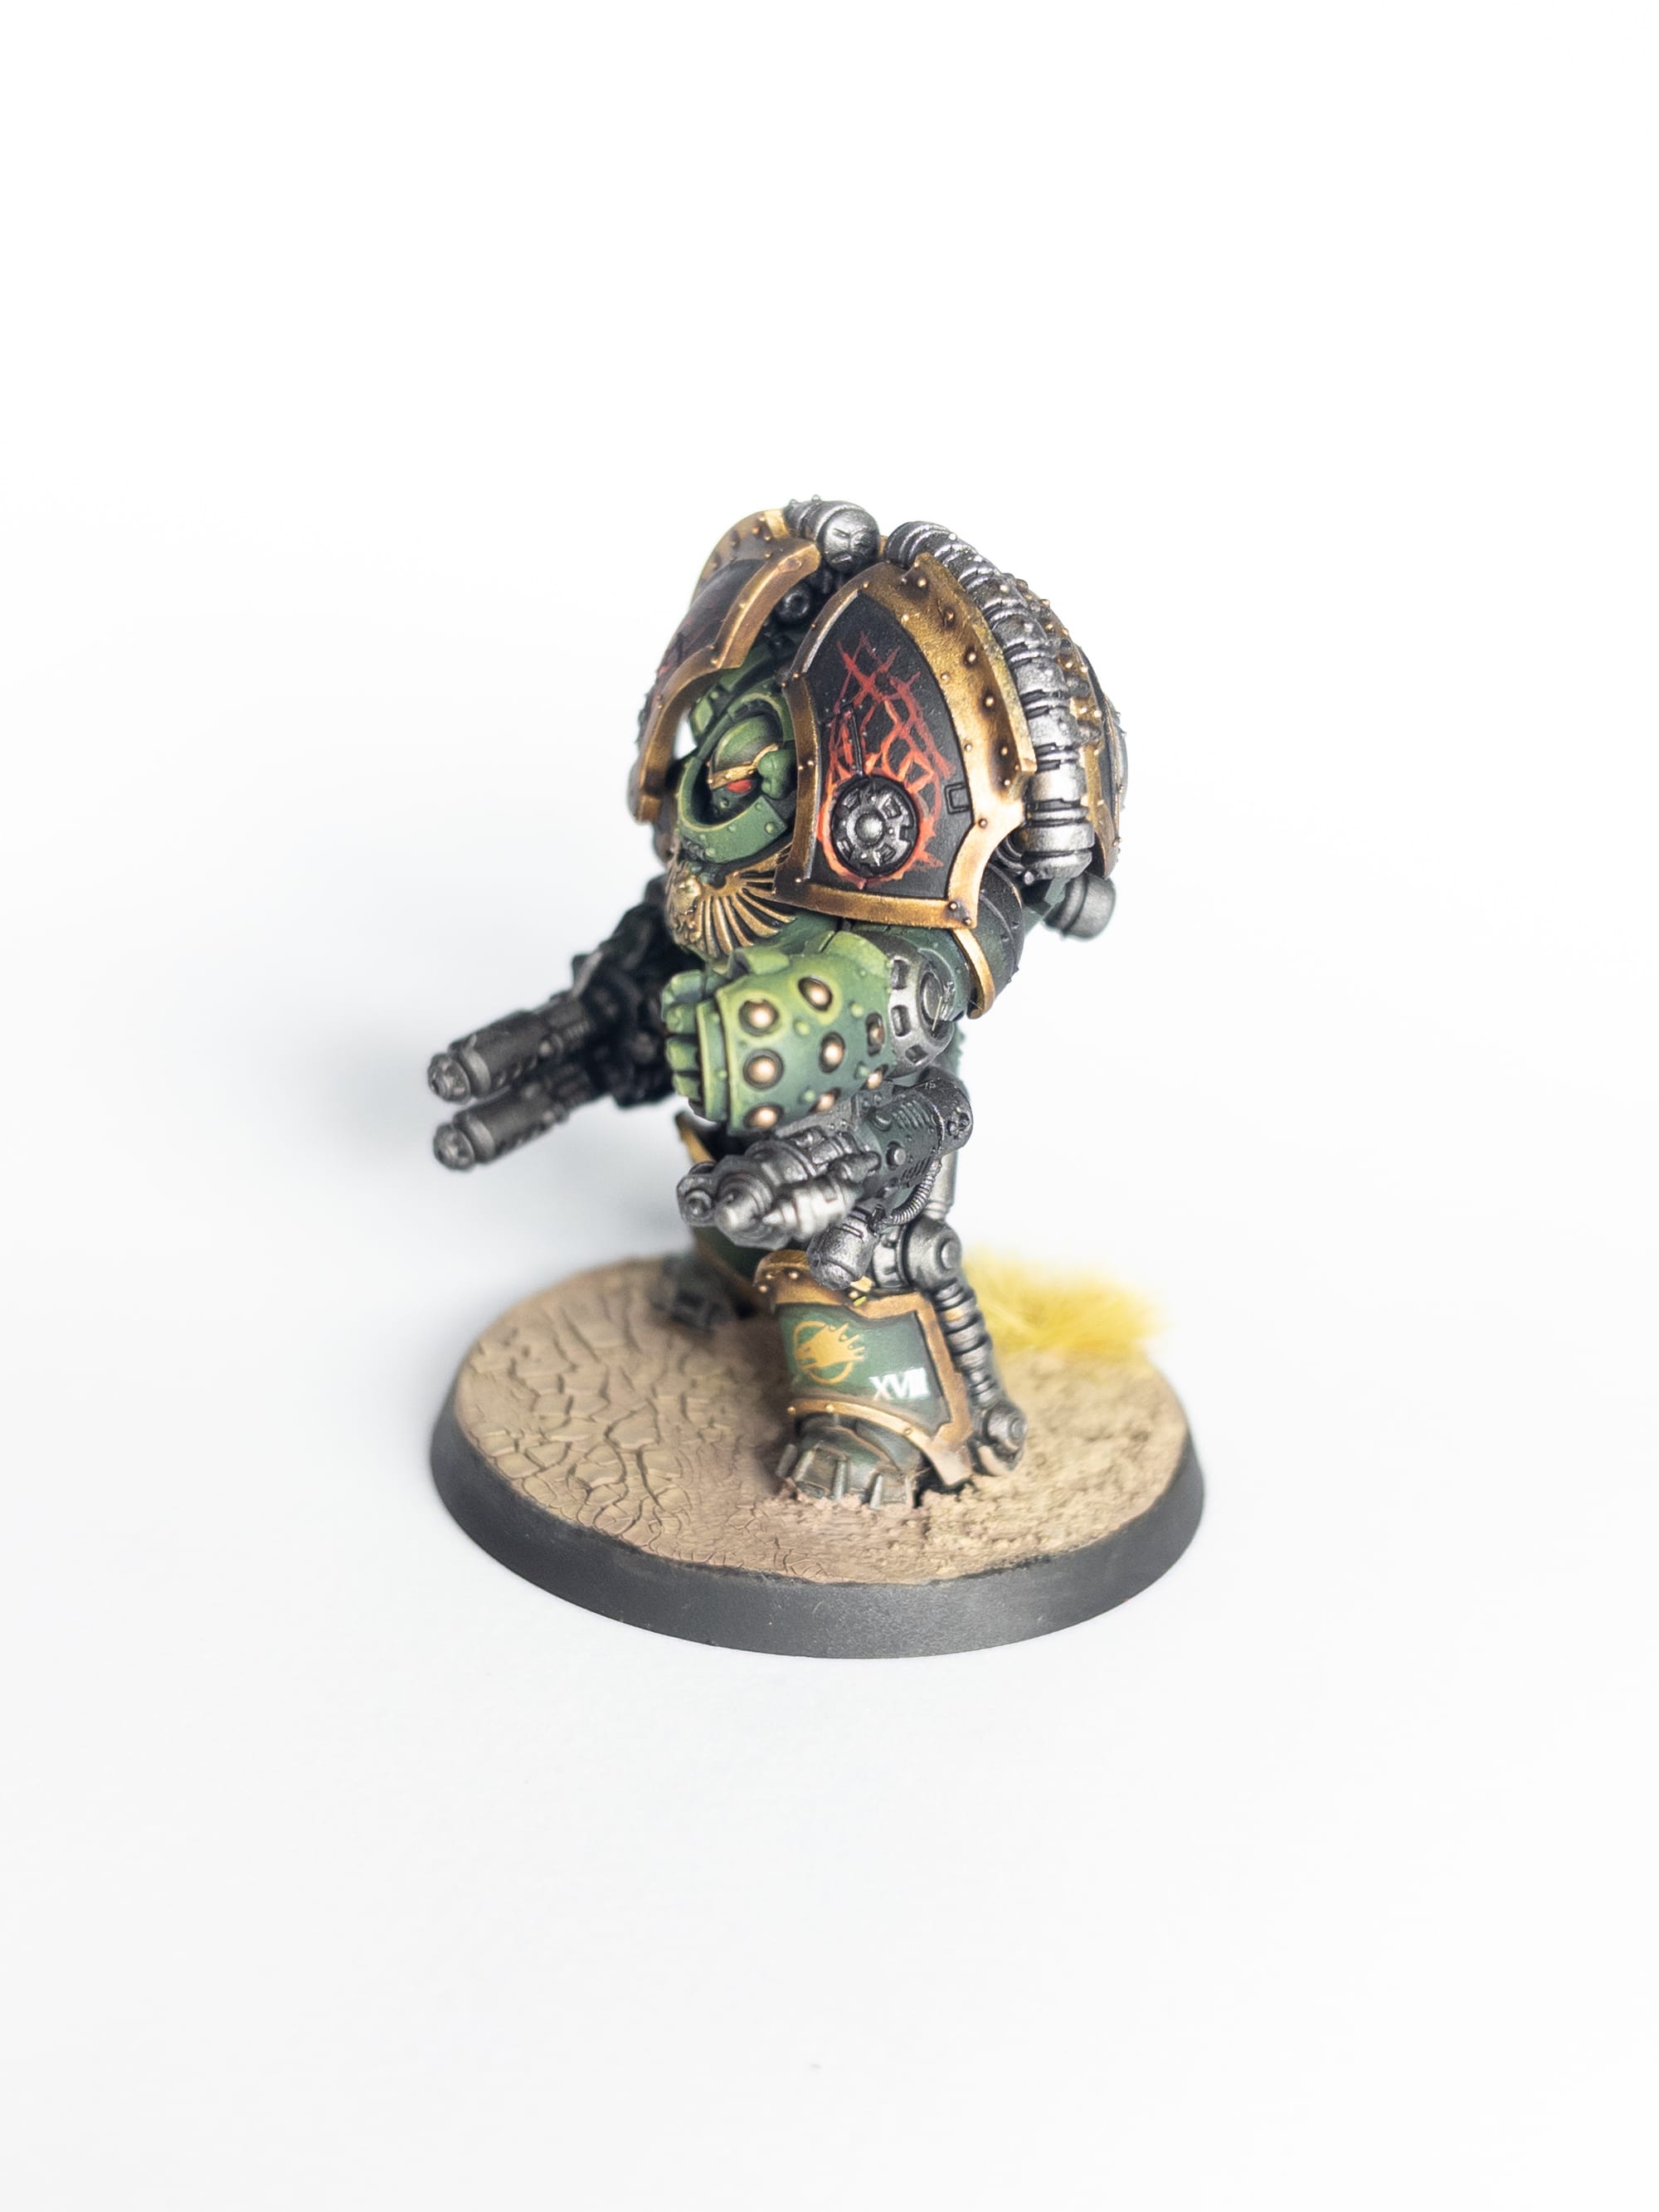

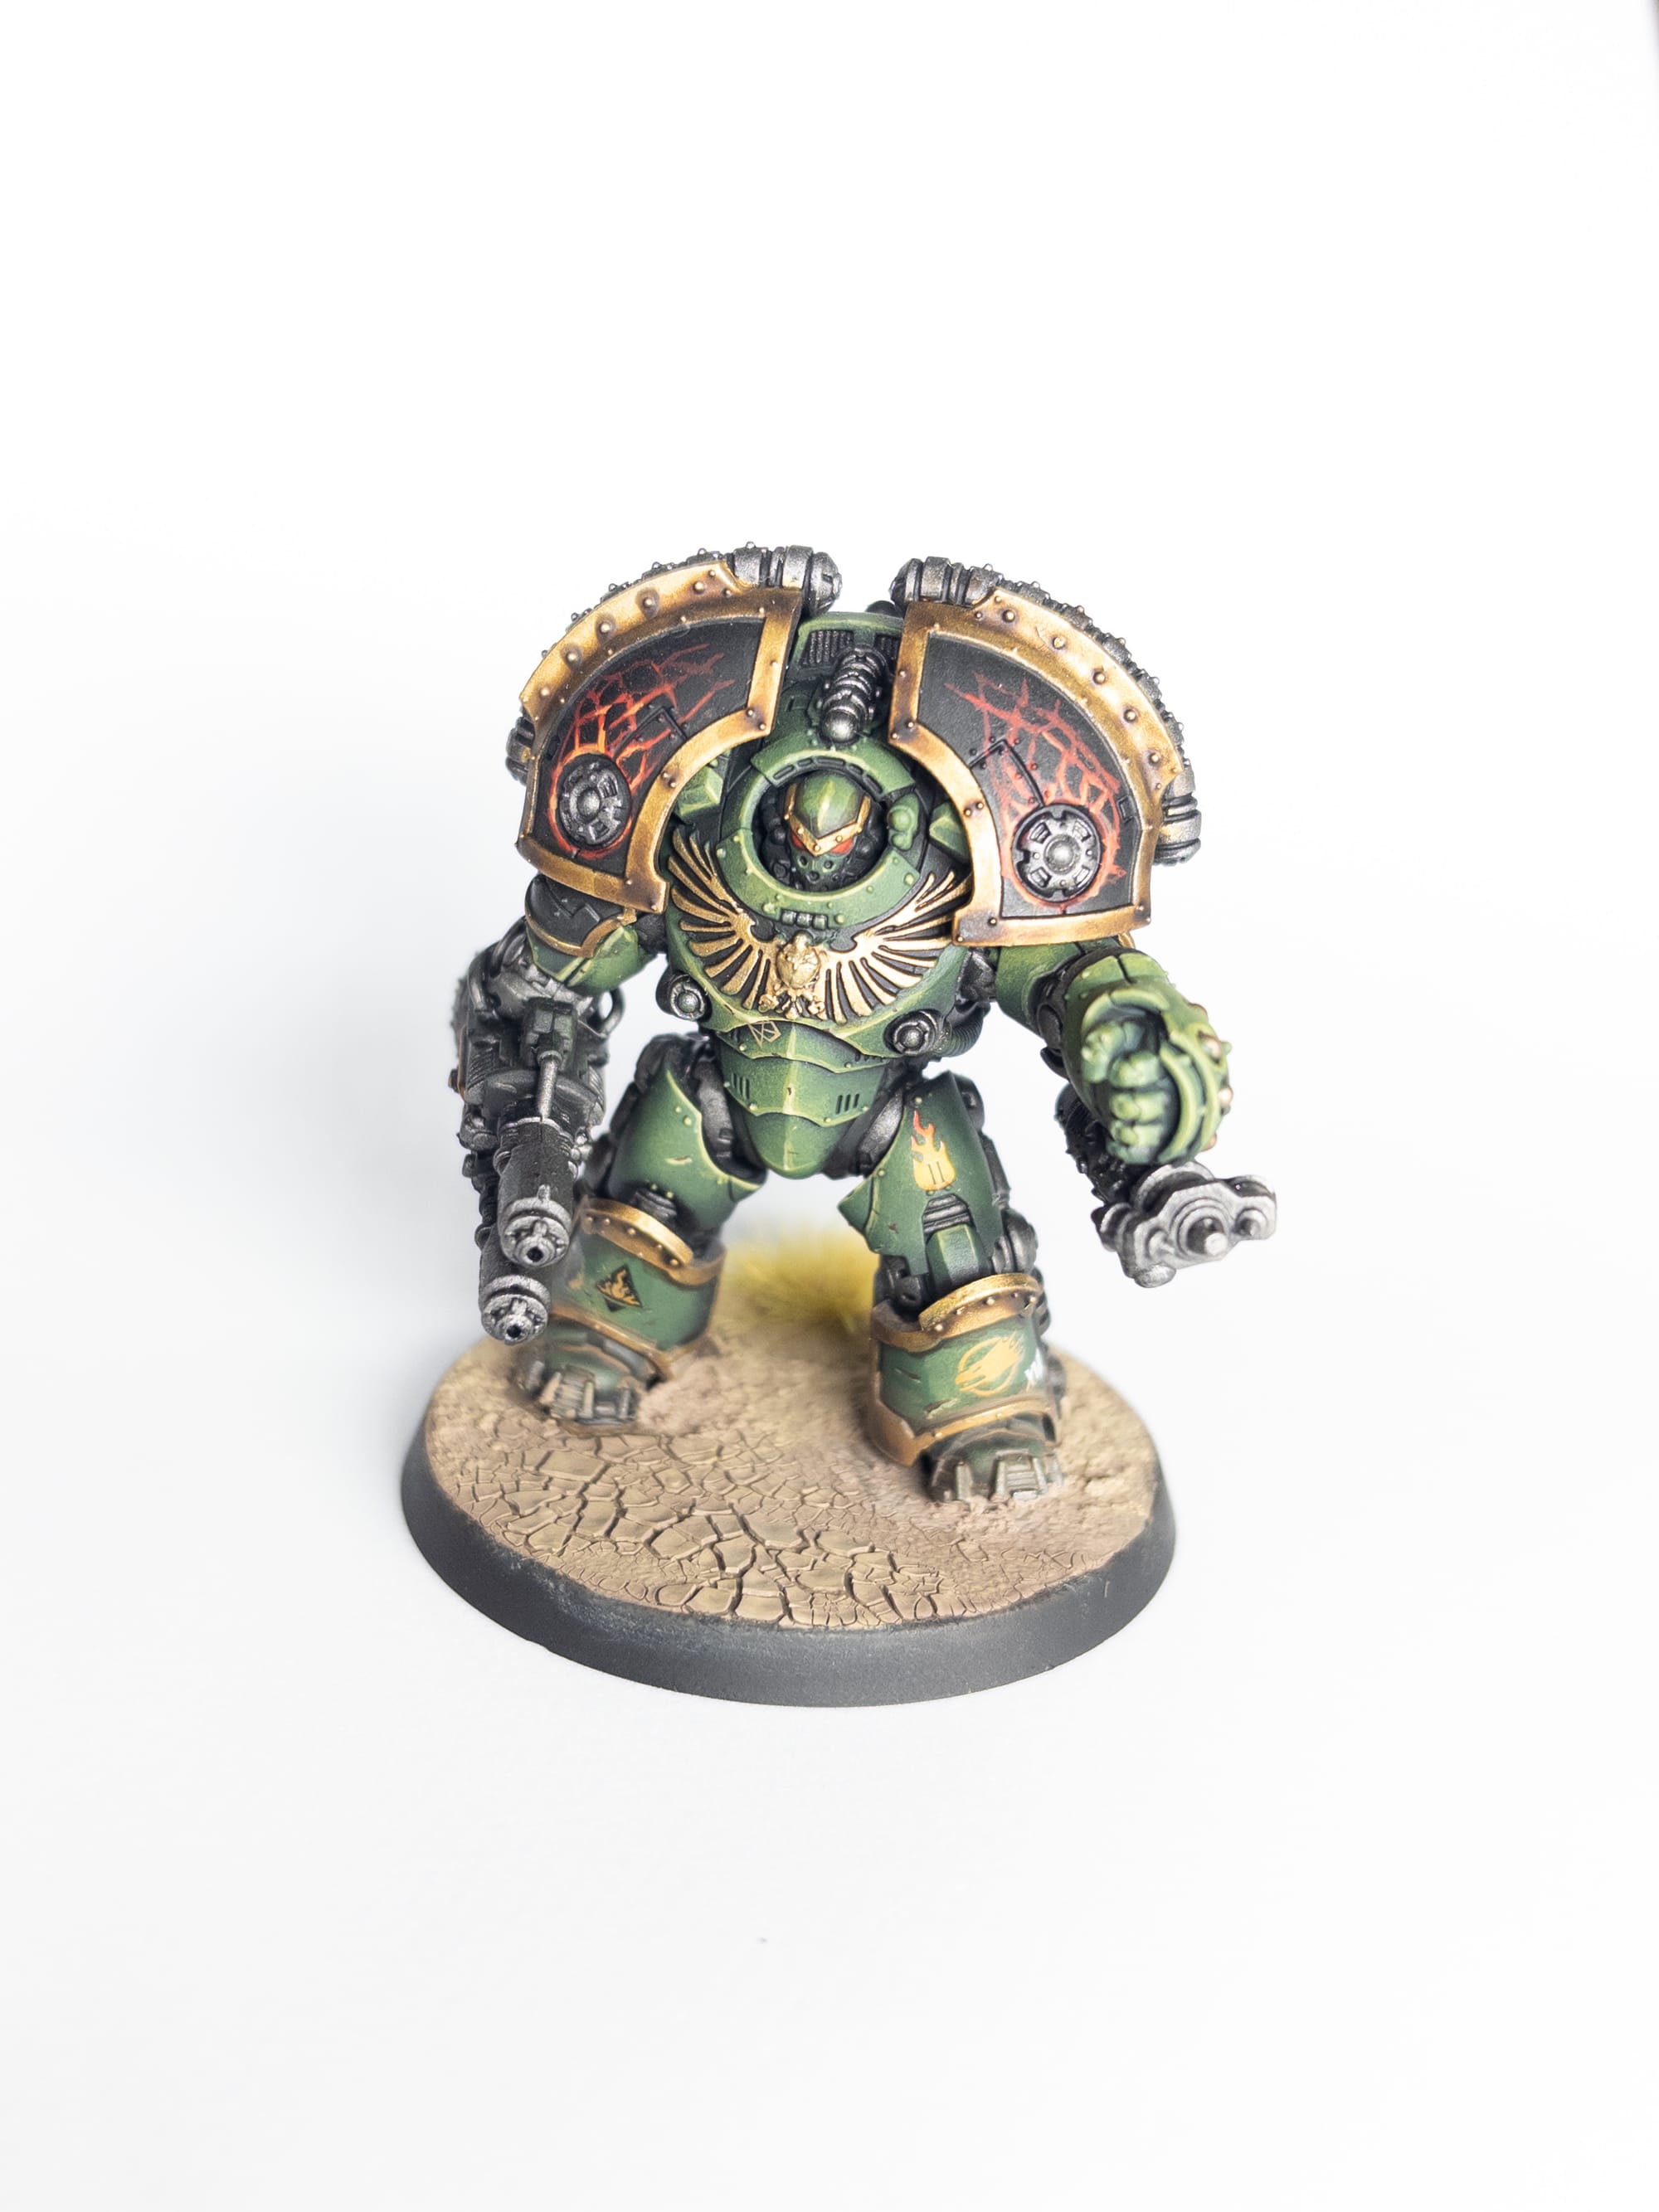
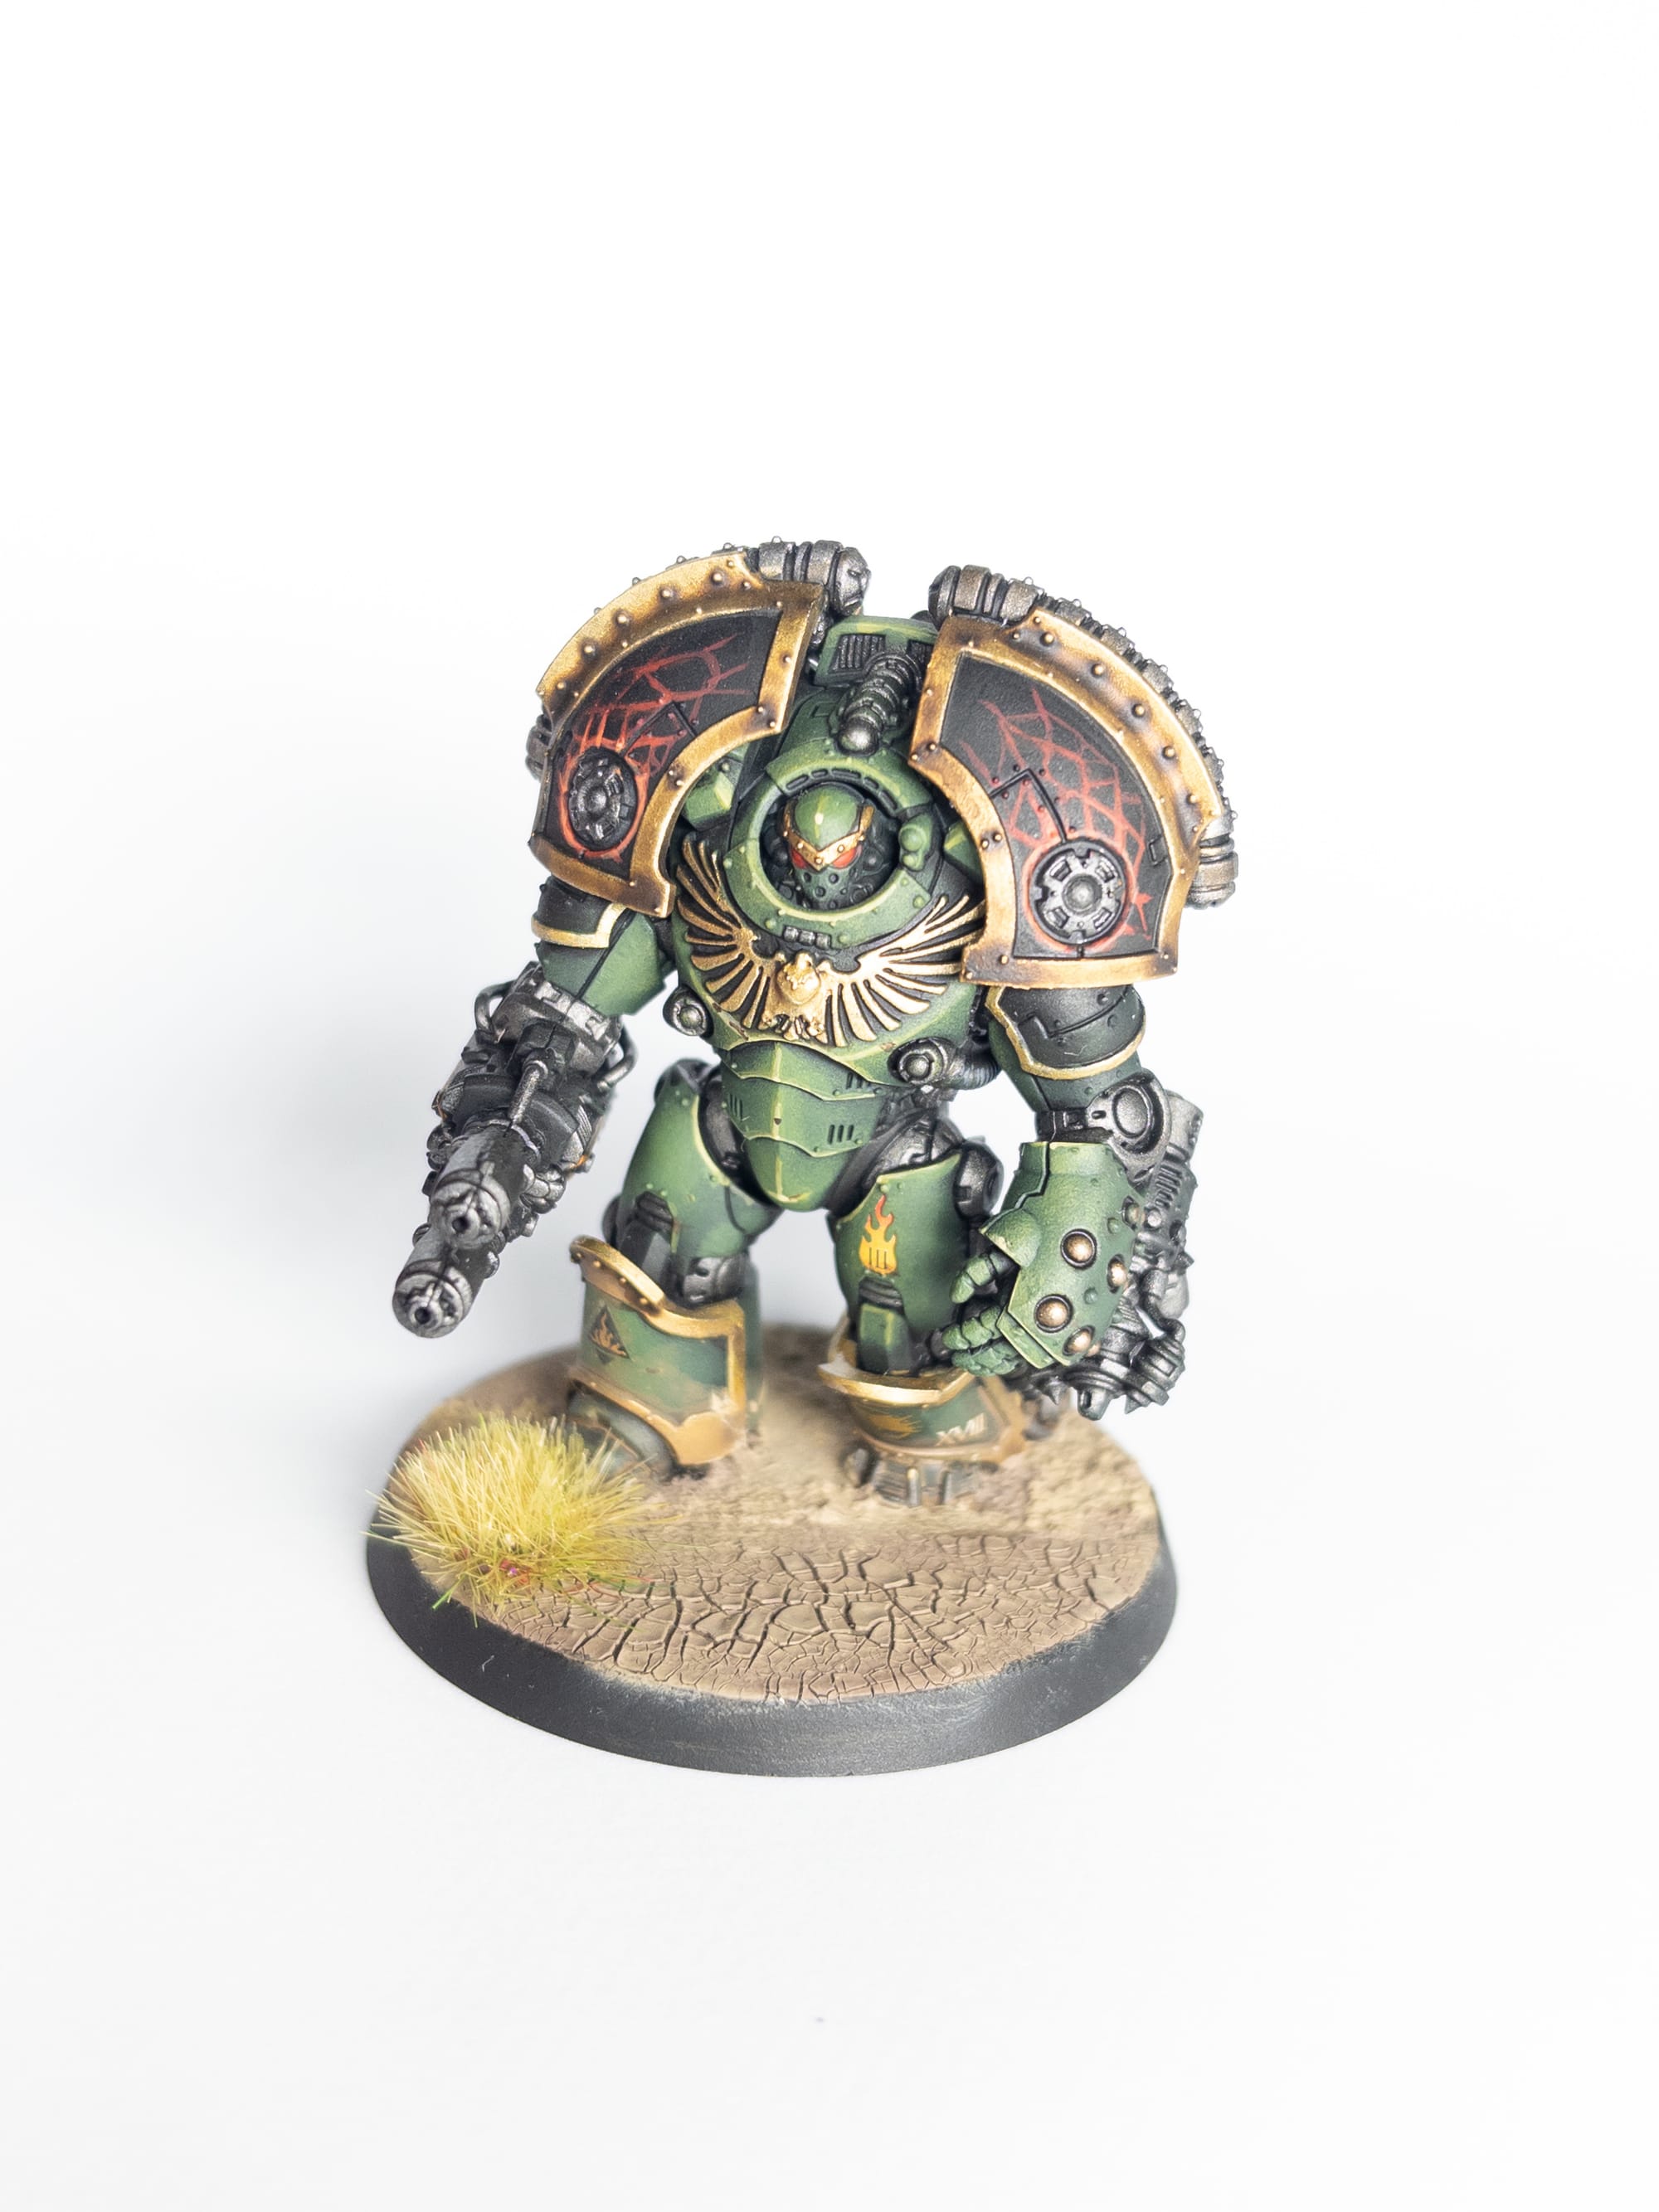
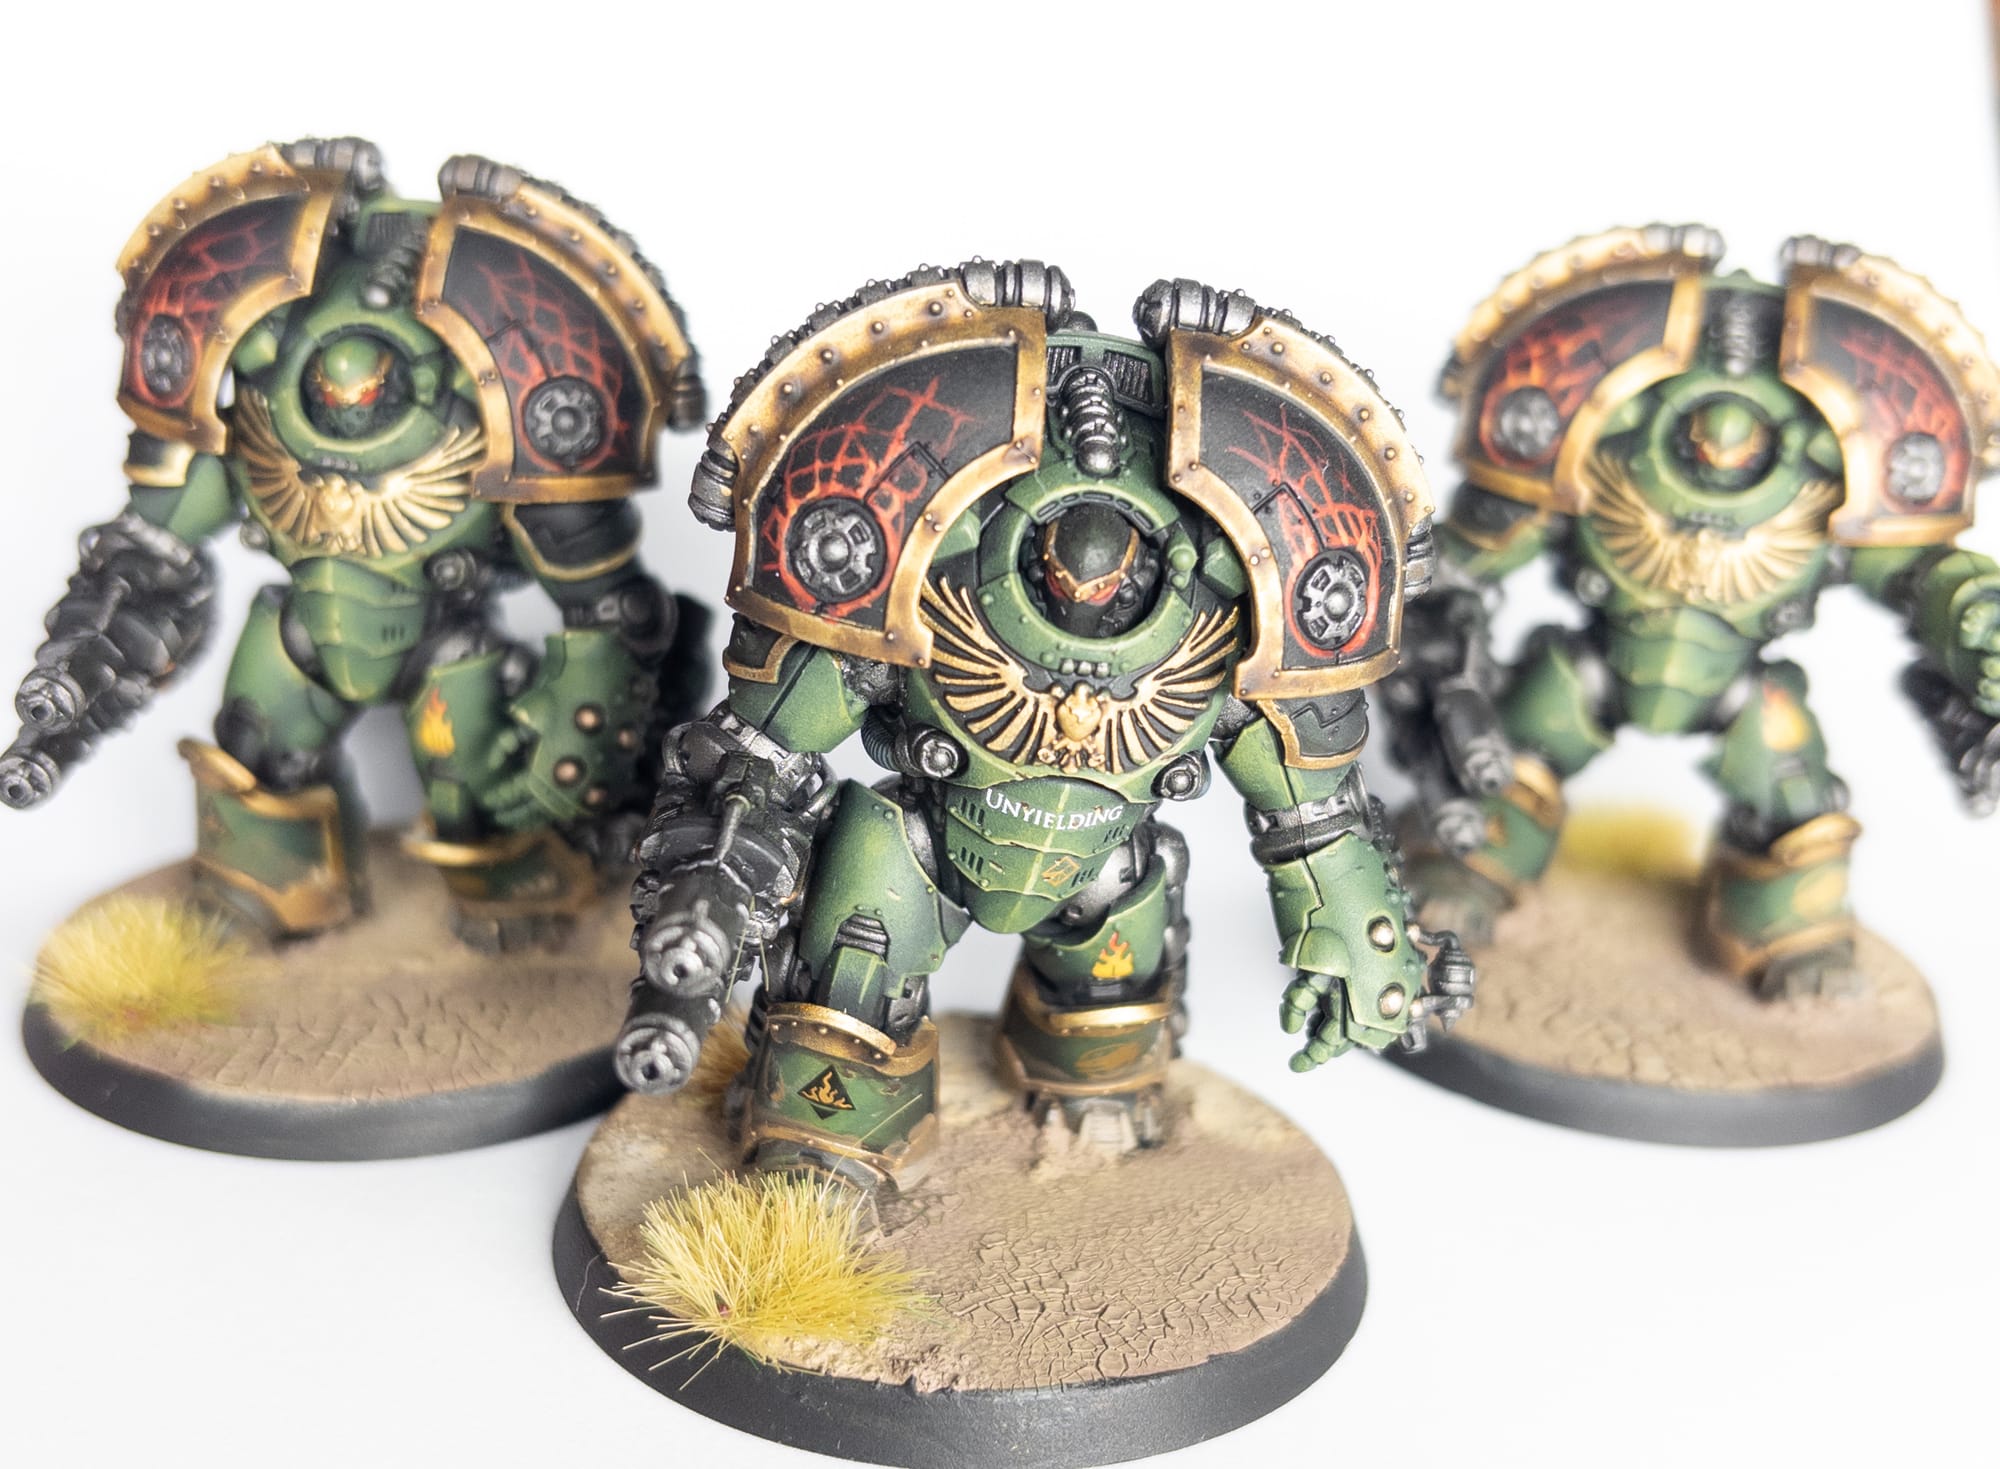
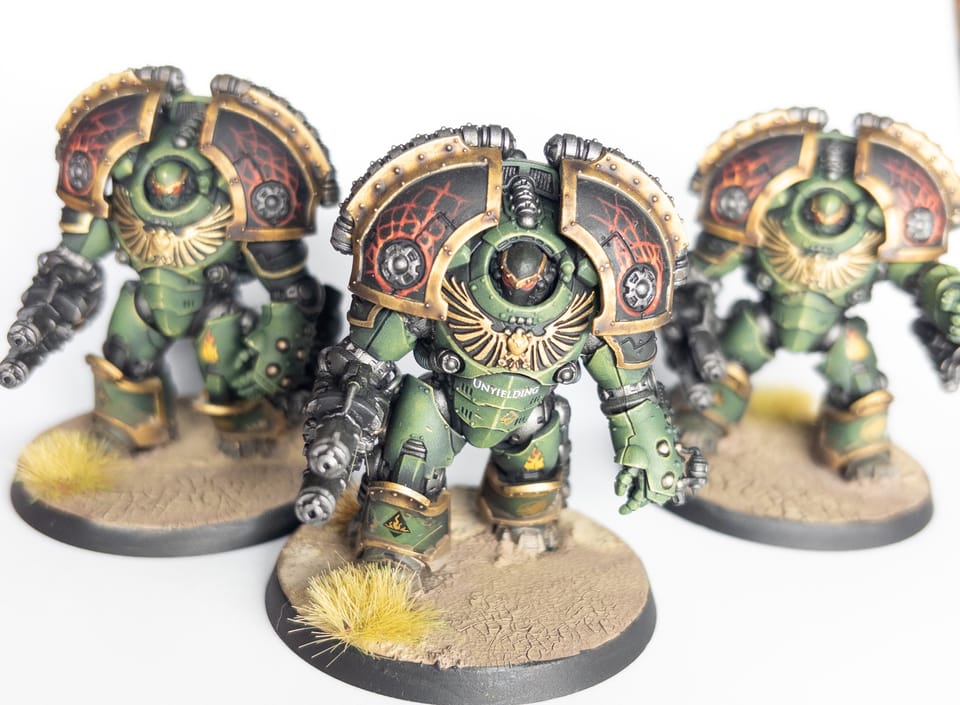
The final, finished models.
Comments ()